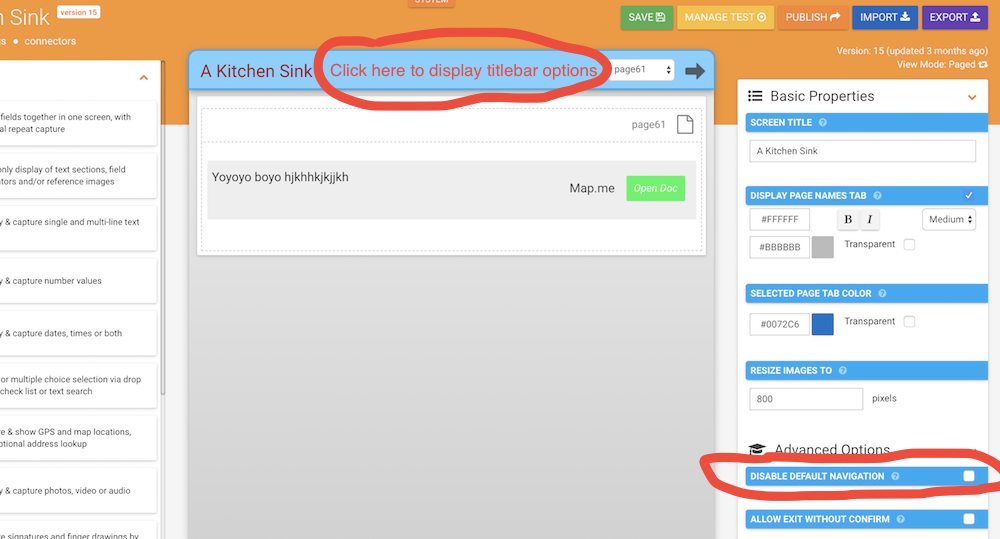
By default every Form you create has automatic navigation buttons in the form of arrows that appear at the top of your Form in the title bar of the app.
These buttons let the user advance forward one page or backwards by one page at a time.
The user can also swipe across the page with their finger to navigate forward and backwards.
However for some Forms, this sequential navigation is not desired since the user needs to be able to jump around the Form as they fill it out.
For example if they were performing a house inspection, they might fill out a “bedroom” page, then a “bathroom” page, then need to fill out another bedroom.
This becomes tedious if the user has to keep moving back or forward to find the pages they need to fill out.
The solution is to disable the automatic page navigation and add your own navigation buttons.
You add the buttons using the User Action field type available in the Form designer, which lets you drop buttons onto any Form page.
Lets go through a simple example.
We assume you have already got an existing Form which has some pages in it. If you don’t, create one and add some pages and fields.
Make sure you have your Form open in the Form designer before proceeding below:
1. In the Form designer, click on the title bar of your Form in the preview area.
This will bring up a set of Form level properties that you can configure.
2. In the list of Form properties, tick the “Disable Automatic Navigation” option.
Your Form will now no longer show the auto navigation arrows and will no longer respond to swipes across the page.
It’s now up to you to ensure that every page in your Form has navigation buttons to let your users move around.
3. Generally the idea is to have a “menu” page (usually the first page in your Form), which will have a set of buttons of it.
Each button will jump the user to a specific page in the Form.
Go ahead and add a page to your form now:
- Set the data name of the page to be something like “menu”.
- Now add a User Action button for each of your form’s pages.
On each of these buttons:- Set the title of the button to be the name of that page – e.g. “Bedroom”, “Bathroom” etc.
- Set the interaction property to the “Jump to Page” option, and then specify the target page in your form to jump to.
4. Now on each of your Form’s pages, you need to add buttons which jump the user back to the “menu” page.
To add these buttons, make use of the User Action field type which lets you drop buttons on your form.
It’s usually best to put these buttons at the bottom of each page, but placement is up to you.
On each of these User Action buttons:
- Set the title to be something like “Back to Menu”
- Set the interaction property to the “Jump to Page” option, and then specify your “Menu” page from step 3. above.
This means that the user will be able to jump back to the Menu page from each of your pages.
5. Depending on your design, you might also want to add a “Finish” button on each page, which will jump the user to the end of the Form.
To do this, simply pick the “End of Form” option under the list of pages to jump to when you set the interaction property on the button.
You can also use the “Upload Form” interaction option if you want to skip the end of Form splash screen completely.
If you don’t want the user to be able to complete Form from every page, then make sure you add a “Finish” button to your menu page.
Remember, all Form navigation is up to you – so make sure there is a way to actually complete and upload the Form!

